Configuring WP Business Listing
Create Listing Categories & Listing Tags first.
Go to WordPress Dashboard -> Listing -> Listing Categories. Specify the details & Click Add New Category when done.

Go to WordPress Dashboard -> Listing -> Listing Tags. Specify the details & Click Add New Tag when done.

Specify a fee applicable to the users for the listings on your site.
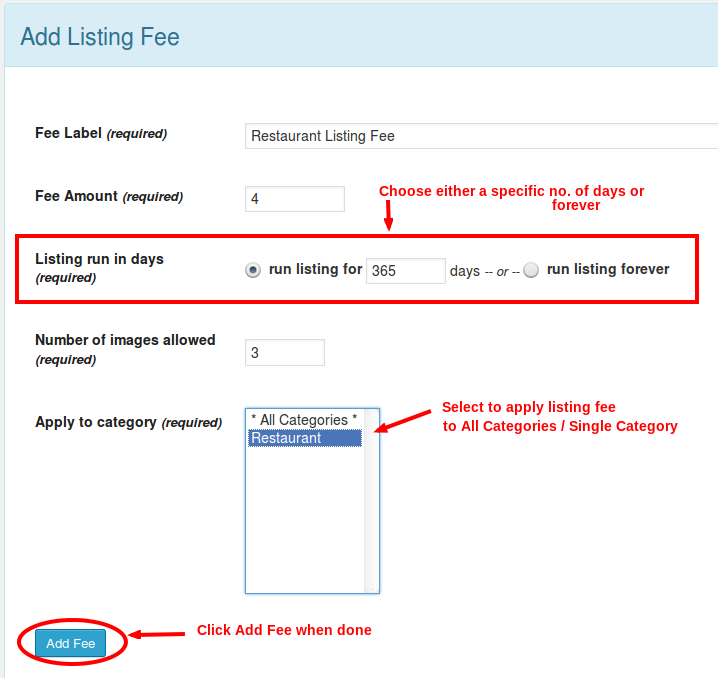
Go toWordPress Dashboard -> WP Business Listing -> Fees Setting & Click Add New Listing Fee.

Specify the details & Click Add Fee when done.

Now create listing for your WordPress site.
Go to WordPress Dashboard -> Listing -> Add New Listing.
Note: Users can submit a new listing on your site from the Business Listing page.

Specify the details & Click Publish when done.

Note: If you want to charge your customers for listings then please turn payments ON from the_WP Business Listing -> Setting -> Payment_menu along with the details of your PayPal account.
4.Enable Payment for listings. Go to_WP Business Listing -> Setting -> Payment_tab.
Check the_Turn On payments? _check-box.
Check the_Activate PayPal? _check-box.
Specify the_PayPal Business Email_ID.

Click Save Changes when done.
Manage the form fields for submitting listings by users on your site.

Last updated
Was this helpful?